
Our colour and writing products are manufactured in our workshops in Geneva since 1915.
BRING COLOUR TO YOUR HOME WITH AN EASY-TO-MAKE FLOWER MOBILE
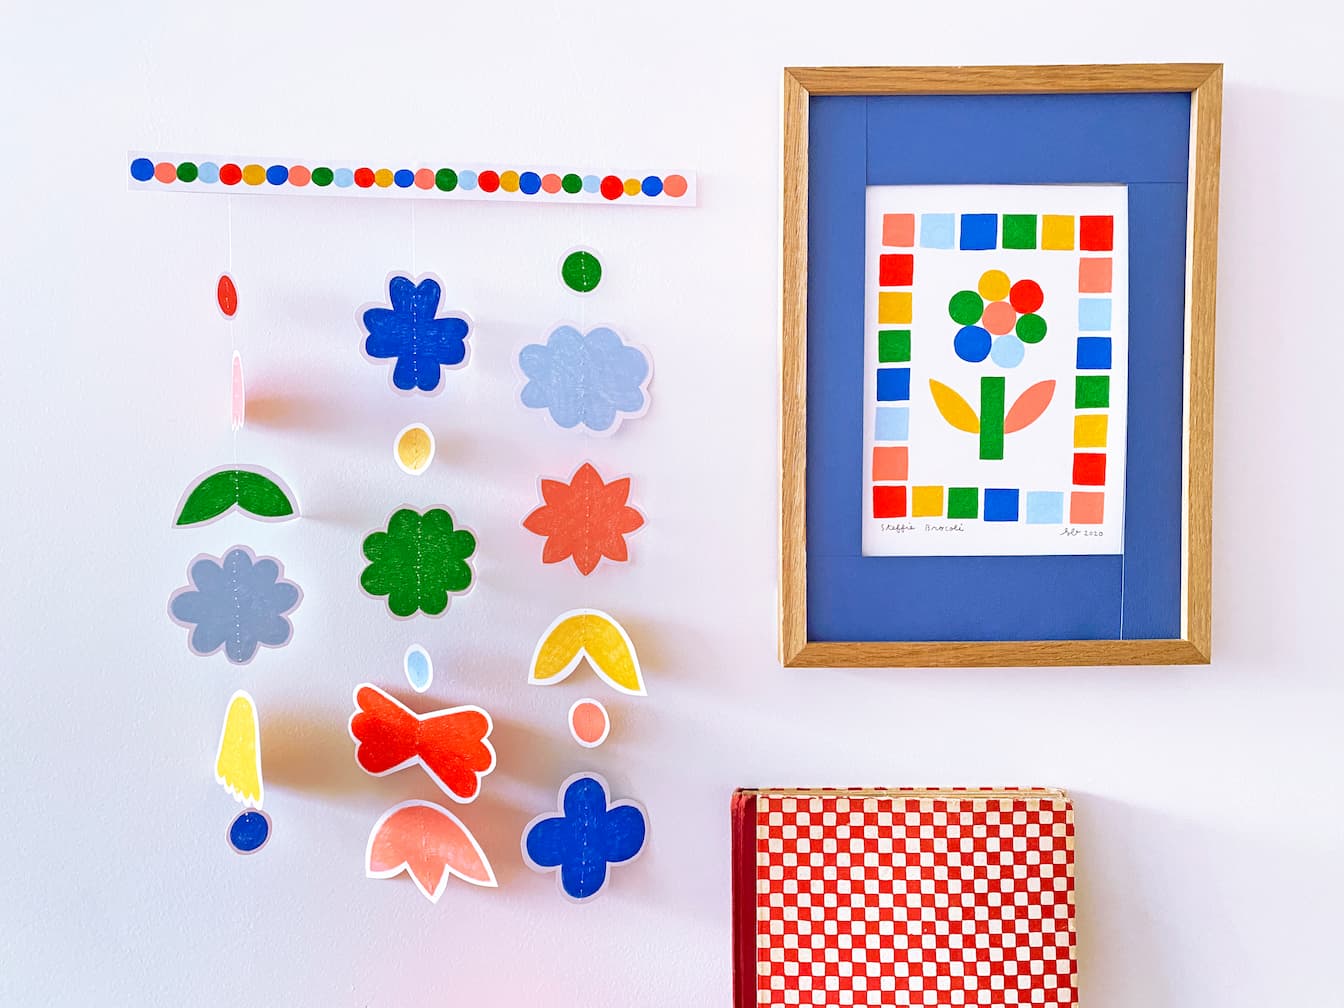
Bring a touch of colour to your home with this easy-to-make flower mobile designed in collaboration with Maison Ribambelle.
This do-it-yourself guide shows you how easy it is to make a pretty paper mobile to decorate your home for next to nothing and a guaranteed impact !
Your walls will be adorned with pretty, colourful flowers for a truly trendy pop decoration! Grab your best pencils, some paper and your imagination and follow our step-by-step guide !
WHAT DO I NEED TO GET STARTED?
- • Luminance 6901© colour pencils
- • Pair of scissors
- • Pencil sharpener
- • 2 sheets of A4 250 g drawing paper of your choice
- • Clear glue
- • Nylon thread (fishing line)
- • Fine sewing needle
- • Microfibre cloth (to remove pencil dust)
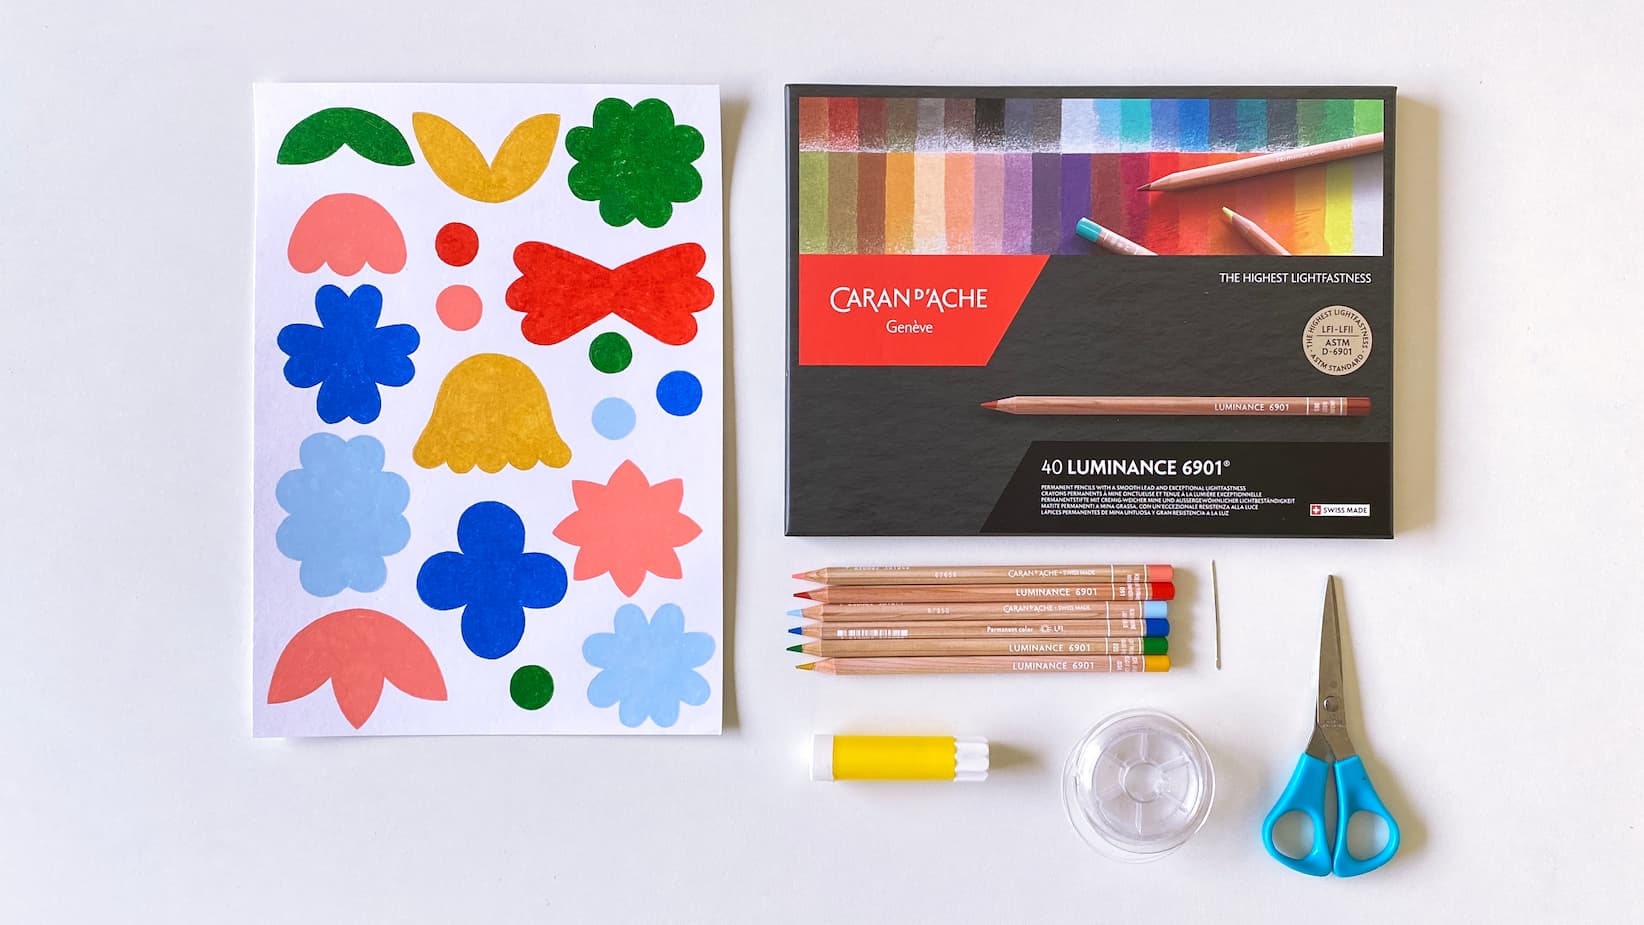


STEP 1 : PRINT THE TEMPLATE
Download and print the patterns using 250 g drawing paper.
Download and print the patterns using 250 g drawing paper.
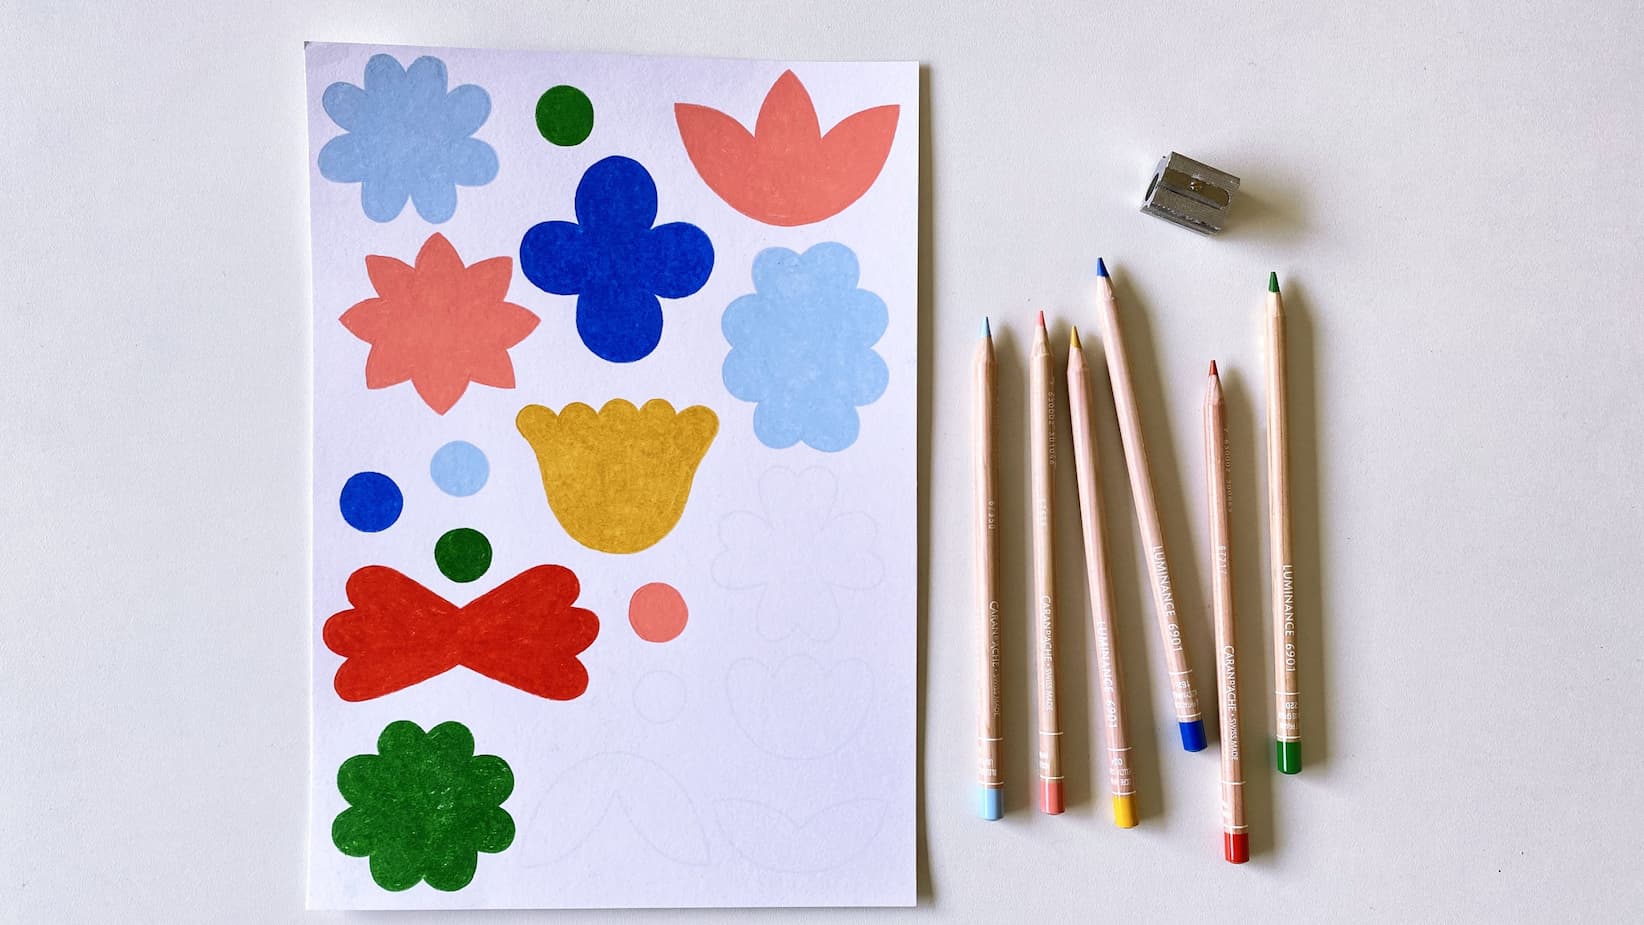
STEP 2 : COLOUR IN THE SHAPES
Colour in the flower shapes as you like (the light grey lines are there as a guide; they disappear under the coloured pencil).
They can be monochrome or multicoloured – have fun ! Gently wipe your drawing with a microfibre cloth every now and then to remove the pencil dust.
Colour in the flower shapes as you like (the light grey lines are there as a guide; they disappear under the coloured pencil).
They can be monochrome or multicoloured – have fun ! Gently wipe your drawing with a microfibre cloth every now and then to remove the pencil dust.
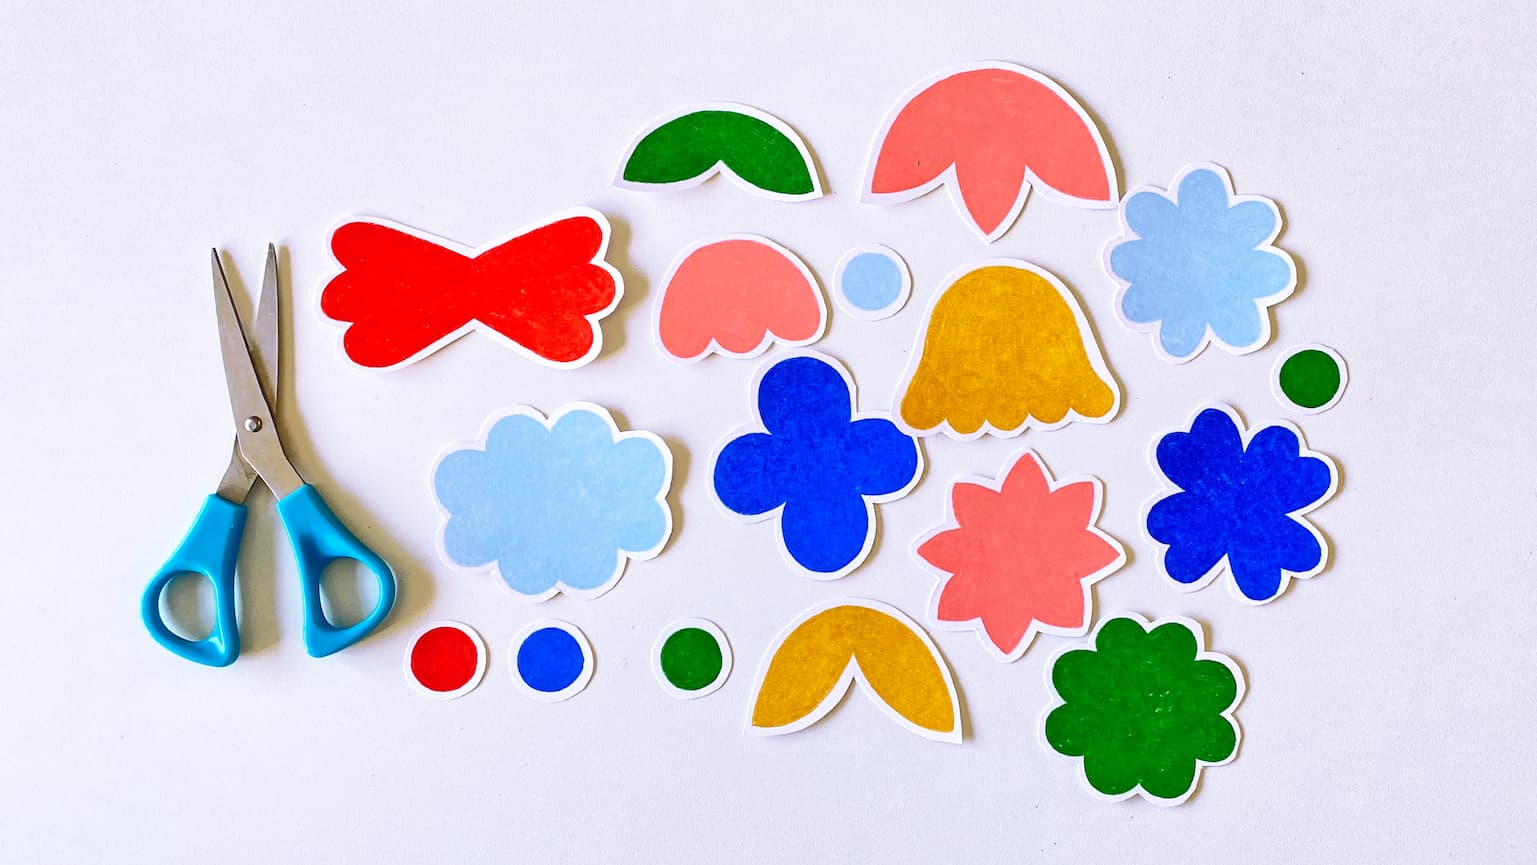
STEP 3 : CUT OUT THE SHAPES
Once you’ve coloured in the flower shapes, cut them out, making sure to leave a few millimetres of white outline. Then colour in the other side.
.jpg)
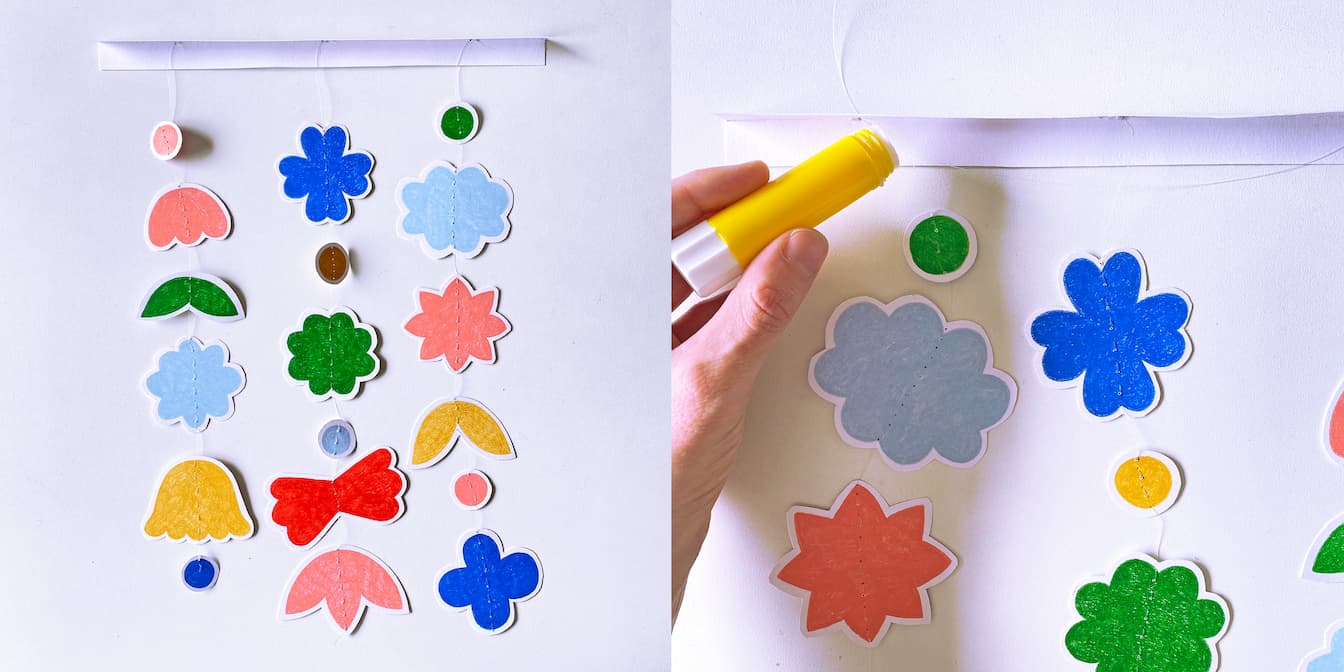
STEP 4 : COMPOSE YOUR GARLANDS
Play around with the shapes to make the three little garlands. Be sure to distribute the shapes uniformly to balance the mobile.
If one of your garlands is longer than the others, place it in the middle.
Play around with the shapes to make the three little garlands. Be sure to distribute the shapes uniformly to balance the mobile.
If one of your garlands is longer than the others, place it in the middle.
.jpg)
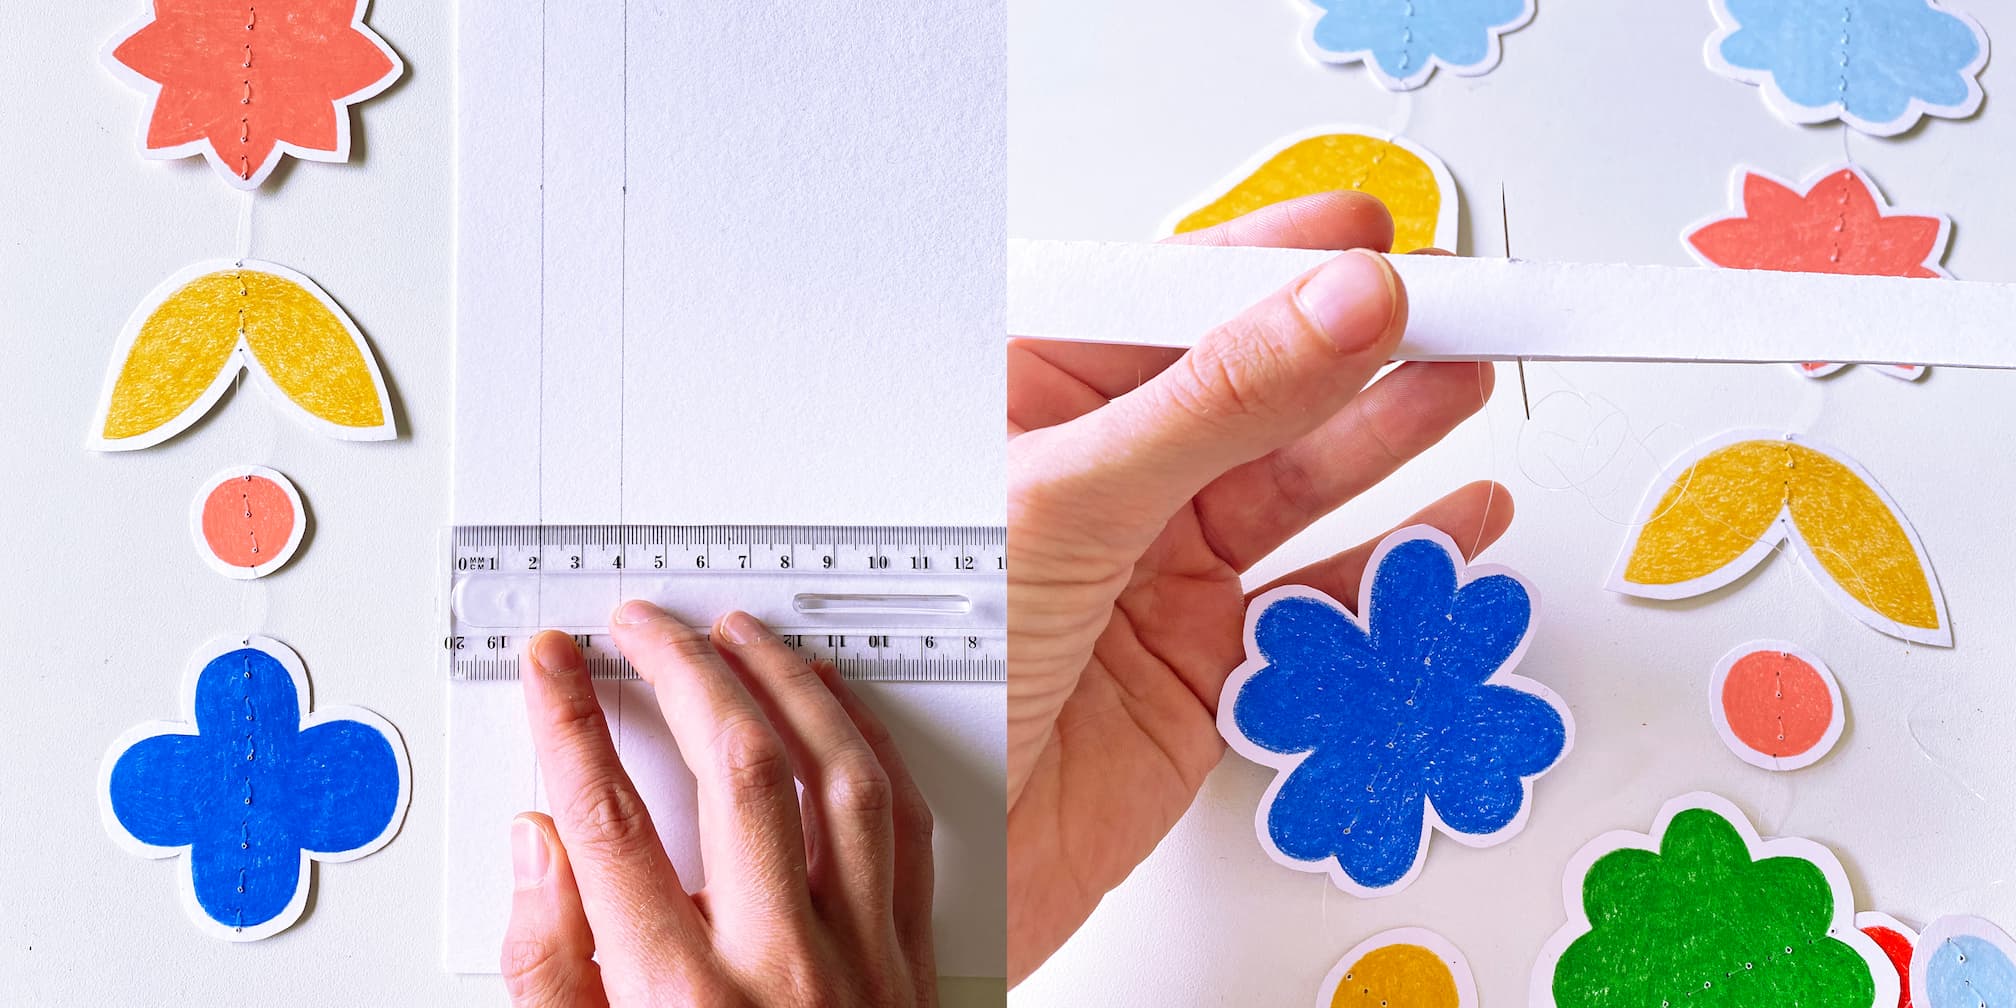
STEP 5 : MAKE YOUR GARLANDS
When you’re happy with your composition, sew the shapes together, starting at the bottom of each garland. Using a needle and a nylon thread about 50 cm in length, make front stitches about 5 mm long and space the shapes about 2 cm apart. Leave a longer piece of thread at the top (about 15-20 cm) in preparation for the final assembly of the mobile.
STEP 6 : ASSEMBLE YOUR GARLANDS
Cut a 4 x 29.7 cm strip from another sheet of 250 g paper. Draw a line down its centre (2 cm from the long edge).
Score along this line (the centre fold) e.g. with a pen that no longer works, then sew the garlands to the support by stitching the threads into the fold.
Cut a 4 x 29.7 cm strip from another sheet of 250 g paper. Draw a line down its centre (2 cm from the long edge).
Score along this line (the centre fold) e.g. with a pen that no longer works, then sew the garlands to the support by stitching the threads into the fold.
Pass a new nylon thread through the paper strip to suspend the mobile (forming a triangle). Now glue the strip shut.
STEP 7 : ARRANGE YOUR GARLANDS
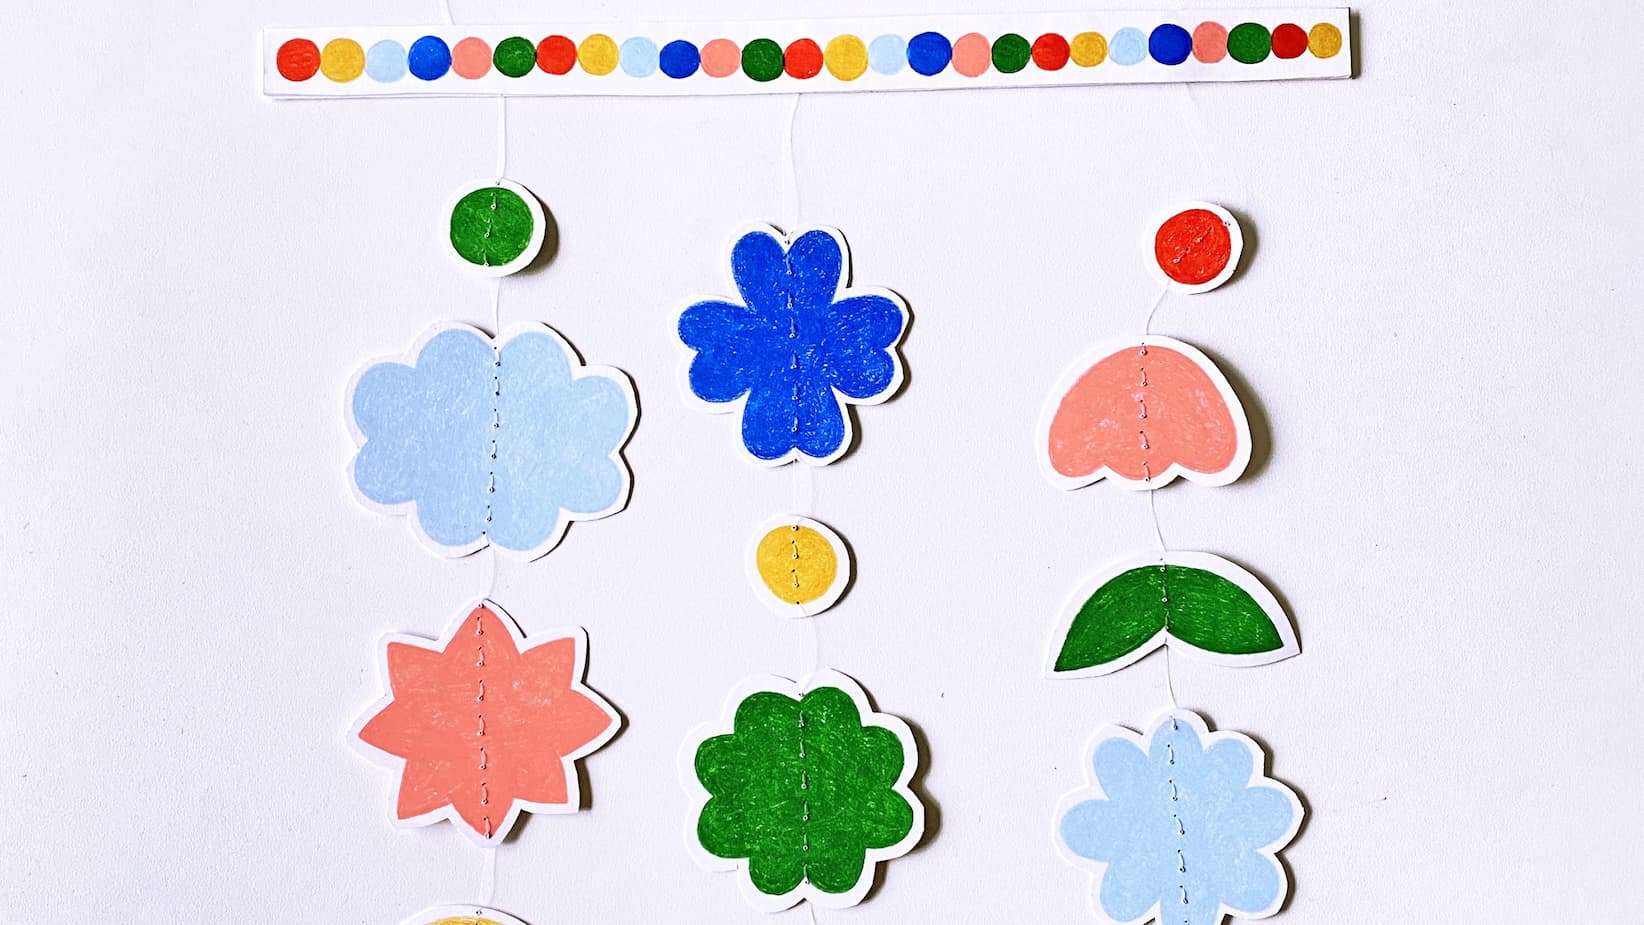
Decorate the paper strip with a pretty pattern and colours of your choice.
Decorate the paper strip with a pretty pattern and colours of your choice.
And that’s it! That’s the mobile finished !
As it’s very light, a piece of paper tape is all you need to hang it from the ceiling or wall – as you wish !
You can accompany it with other creations to brighten up your home!
As it’s very light, a piece of paper tape is all you need to hang it from the ceiling or wall – as you wish !
You can accompany it with other creations to brighten up your home!

We’d be delighted to see the result of your creativity ! Feel free to share them on the social networks using our hashtag #Carandache and mentioning @carandache.
Fancy continuing in this creative vein ? Follow our other DIY guides.
Fancy continuing in this creative vein ? Follow our other DIY guides.
Free from 80€ purchase.
Possible return under 14 days.
Possible return under 14 days.


Monday to Friday from 10am to 7pm and Saturday from 10am to 5pm.
+41 (0) 848 558 558
(Calls from Switzerland : at local rate. Calls from abroad : at telecom provider’s international rate.)
+41 (0) 848 558 558
(Calls from Switzerland : at local rate. Calls from abroad : at telecom provider’s international rate.)
![]()
Create an account to benefit from all the exclusive advantages of our loyalty program.
 Belgium
 Switzerland
Let’s stay in touch
Subscribe to our newsletter and benefit from a 10% discount on your next order.