
Our colour and writing products are manufactured in our workshops in Geneva since 1915.

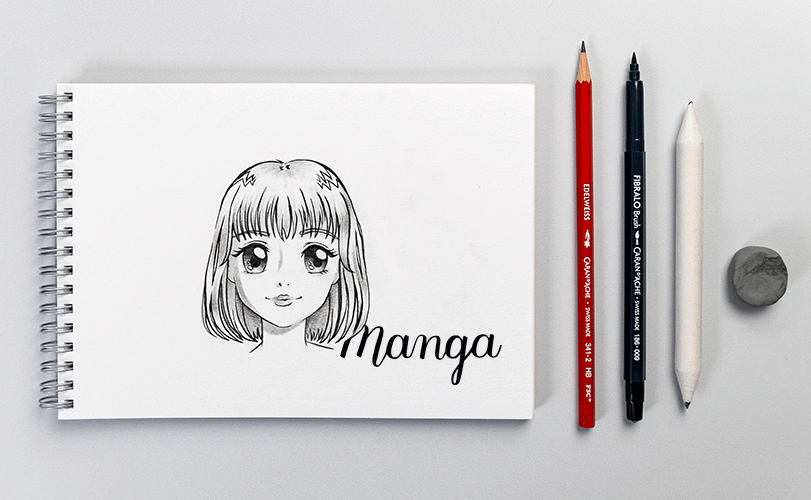
LEARN THE BASICS OF DRAWING MANGA
STEP-BY-STEP
STEP-BY-STEP
Do you enjoy manga and want to create your own manga style characters? Popularised by mangaka such as Osamu Tezuka (Astro Boy), Akira Toriyama (Dragon Ball), and Naoko Takeuchi (Sailor Moon), manga drawing follows its own specific codes.
Proportions, facial features and perspective: discover the step-by-step guide to basic techniques and the essential supplies you’ll need to get started and create your first manga drawings.
THE ORIGINS OF MANGA
Manga drawings are rooted in ancient Japanese artistic tradition, influenced by woodblock prints and illustrated stories. The term itself was popularised by Hokusai and originally referred to spontaneous and free-form drawings.
After World War II, authors such as Osamu Tezuka modernised this graphic style by drawing inspiration from cinema and Western animation. They established the codes we still recognise today: large expressive eyes, dynamic storytelling, stylised characters, and bold ink lines.
Join our Creative Classes by Caran d’Ache: online art classes designed for every level, from beginner to experienced artist.
DRAW A MANGA STYLE FACE WITH OUR STEP-BY-STEP DRAWING TUTORIAL
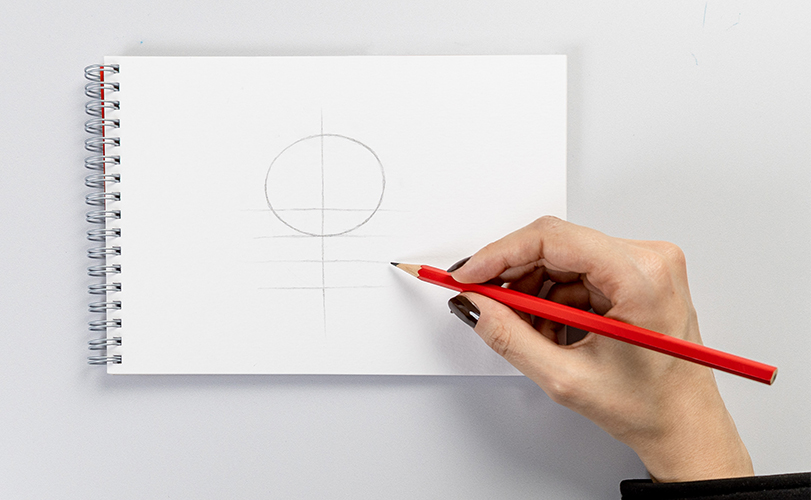
Step 1: Draw the shape of the face
Draw a circle and then trace a vertical line down the middle of it to help keep things symmetrical.
Then add three horizontal lines:
• One in the middle of the circle where you’ll place the eyes
• One for the nose
• One for the chin
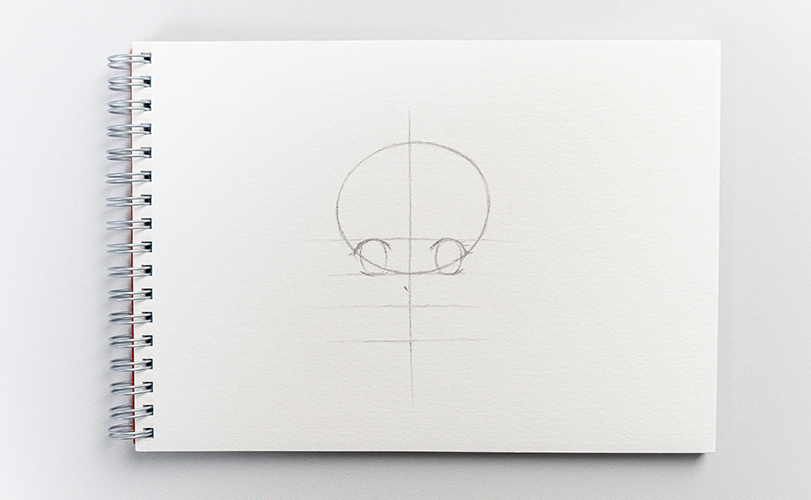
Step 3: Define the face’s outline
Using the circle, trace the lines that make the face’s outline.
Starting from the circle’s sides, trace a line that curves down to the chin line to draw the jaw. Finish with a sharp or rounded chin depending on the desired effect.
Be sure to keep things symmetrical as this is what brings balance to the face.
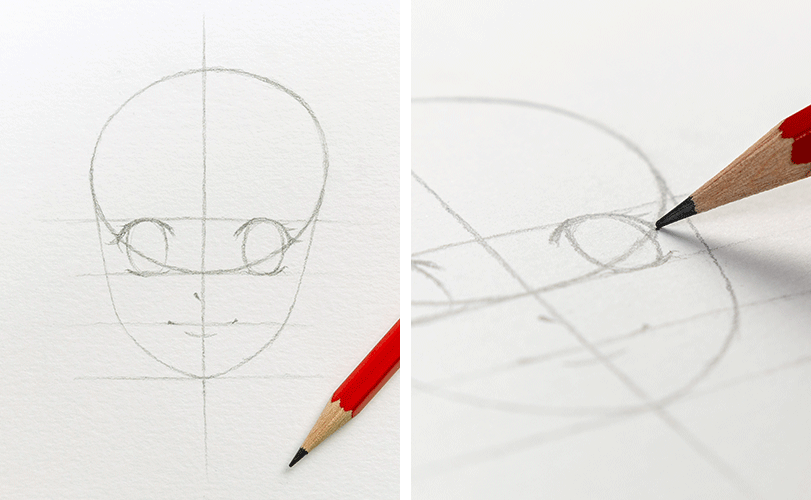
Step 4: Place the nose and mouth
In manga, the nose is often very simple. Place it below the eye line, in the centre of the face.
For the mouth, trace a small line below the nose. It can also be very minimal, depending on the desired expression.
Ears are generally placed between the eye line and the nose line. Even if they are sometimes hidden by hair, place them anyway to keep the features in proportion.
For the mouth, trace a small line below the nose. It can also be very minimal, depending on the desired expression.
Step 5: Add ears
Ears are generally placed between the eye line and the nose line. Even if they are sometimes hidden by hair, place them anyway to keep the features in proportion.
Step 6: Draw the hair
Start by defining the overall shape of the hair and then add strands.
There’s no need to draw every single hair. Think instead in terms of sections:
• A fringe
• Strands on the sides of the head
• Volume on the top
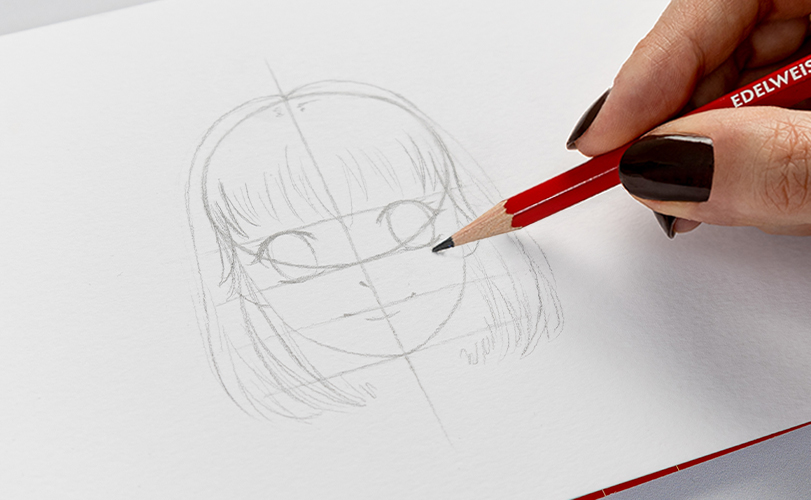
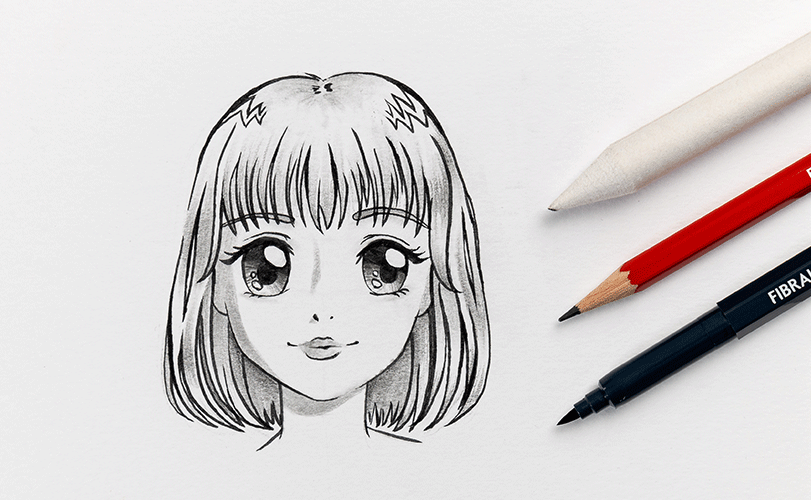
Step 7: Add the neck and some other details
Draw a slender neck that starts below the jawline.
Then add:
• Eyebrows
• Some detail in the eyes
• Light shadowing (hair, neck)
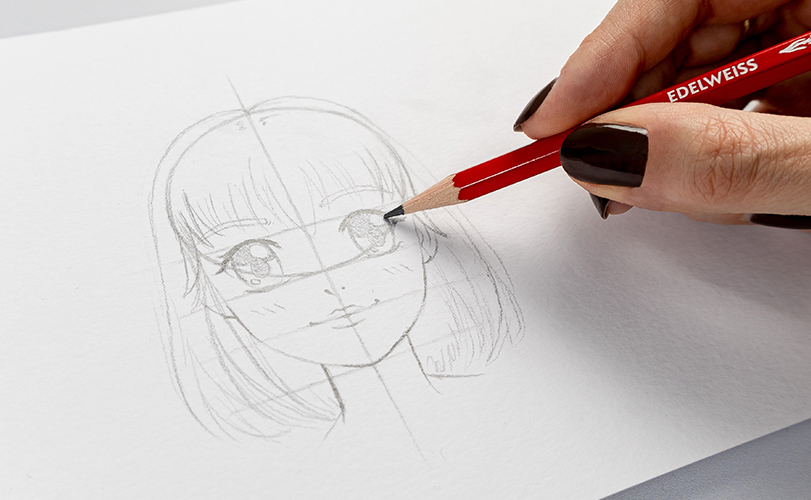
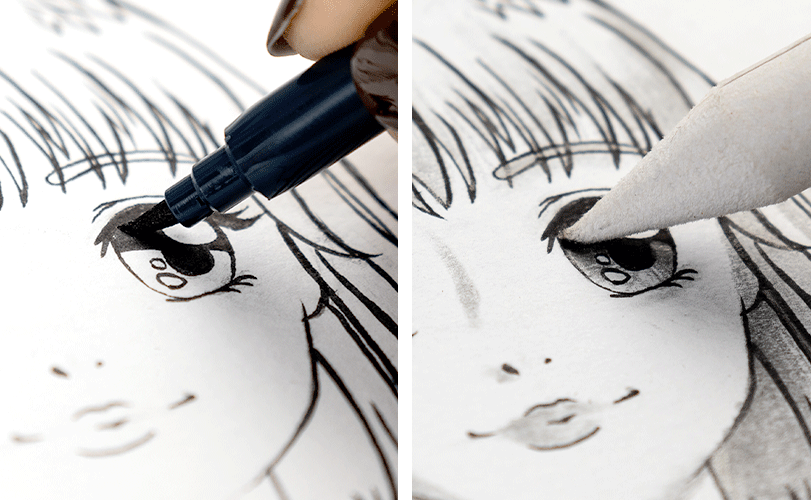
Step 8: Finalise the linework
Erase the guidelines and go over the main ones.
You can keep the line light and fine or emphasise certain outlines, such as:
• The upper eyelid
• The fringe
• The outline of the face
SUPPLIES YOU’LL NEED FOR MANGA DRAWING
Manga drawing doesn’t require many supplies:
• Graphite pencil for sketching your first lines
• A kneaded eraser, ideal for correcting without damaging the paper
• Suitable drawing paper, thick enough to handle corrections and inking
• A blending stump or blender pencil
Caran d’Ache supplies are the ideal companions at every step of your manga drawings, from the sketching to the inking stages.
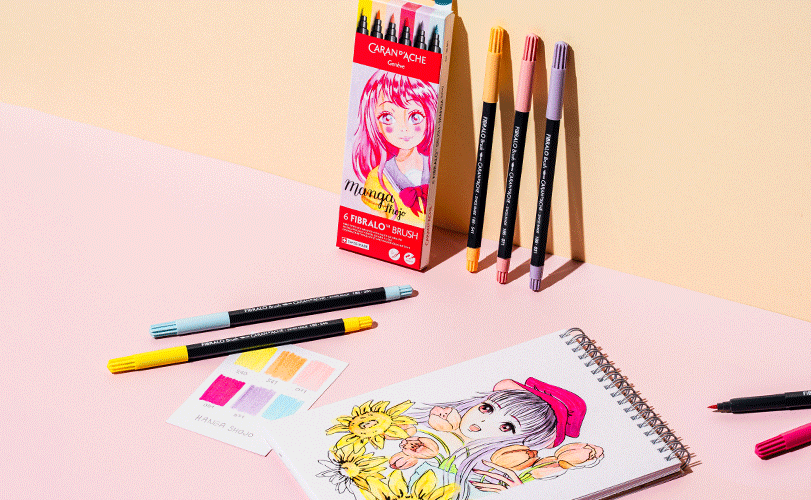
Discover: the Fibralo™ Brush Manga Shojo set
Designed to explore the codes of shōjo manga drawing, this set features a palette of bright, soft, and expressive colours. Its shades are perfect for illustrating eyes, hair, and emotions in all your characters. Refine your gradients and explore the richness of tones to bring more character and sensitivity to each of your creations.
Create delicately poetic scenes with this set - an invaluable ally to enrich your style and assert your artistic universe.
Designed to explore the codes of shōjo manga drawing, this set features a palette of bright, soft, and expressive colours. Its shades are perfect for illustrating eyes, hair, and emotions in all your characters. Refine your gradients and explore the richness of tones to bring more character and sensitivity to each of your creations.
Create delicately poetic scenes with this set - an invaluable ally to enrich your style and assert your artistic universe.
OUR TIPS ON HOW TO IMPROVE YOUR MANGA-STYLE DRAWINGS
Reproduce manga faces
Observation and reproduction are often the best starting points when it comes to drawing. By copying faces, you understand where to place the eyes, how volume is constructed, and why certain strokes work better than others.
Find inspiration by reading manga and watching anime.
Also experiment with different styles, compare and adjust — this is how you’ll develop your personal style.
Practise drawing facial expressions
Expressions give personality to a character. A simple modification in the eyes or mouth can change everything.
Draw the same face multiple times and vary the emotions: joy, anger, surprise… This exercise helps you understand how to simplify and make expressions clear and easy-to-read.
Draw simple poses
Before you attempt more complex poses, start with simple ones. A character that’s standing, walking or slightly in motion helps you to work on the body’s balance and proportions.
Gradually, you can add more movement and explore more varied and dynamic postures.
Work on your perspective
Perspective adds depth and movement to manga drawings. Observe the differences between a front view, a side view, or one in motion. An arm extended forward will naturally appear larger than one positioned behind it.
To practise using perspective in your drawings, sketch your characters using simple shapes and volumes (cylinders, spheres). Also play with scale and overlap: objects that are closer appear larger and can partially hide those behind them.

Free from 80€ purchase.
Possible return under 14 days.
Possible return under 14 days.






Monday to Friday from 10am to 7pm and Saturday from 10am to 5pm.
+41 (0) 848 558 558
(Calls from Switzerland : at local rate. Calls from abroad : at telecom provider’s international rate.)
+41 (0) 848 558 558
(Calls from Switzerland : at local rate. Calls from abroad : at telecom provider’s international rate.)

Create an account to benefit from all the exclusive advantages of our loyalty program.
Choose your online shop based on which country your order will be sent to
 Switzerland
Let’s stay in touch
Subscribe to our newsletter and benefit from a 10% discount on your next order.