Our colour and writing products are manufactured in our workshops in Geneva since 1915.
DIY: decorate your festive table with creative and unique Easter eggs
Whether they are made of chocolate or merely decorative, eggs are everywhere at Easter and your children are excited to take part in the traditional egg hunt in the garden. This year, why not make the most of this festive period to come up with some unique Easter decorations for your table by organising a creative DIY workshop with your family?
Surprise your guests by making your own Easter eggs and add a creative touch to your festive table. Get the right supplies and let your imagination run free to transform simple eggs into original decorative items. Follow our step-by-step DIY tutorial to create beautiful, personalised Easter eggs with your children.
Surprise your guests by making your own Easter eggs and add a creative touch to your festive table. Get the right supplies and let your imagination run free to transform simple eggs into original decorative items. Follow our step-by-step DIY tutorial to create beautiful, personalised Easter eggs with your children.
DECORATING EASTER EGGS: A MUST-DO CRAFT ACTIVITY FOR YOUR FESTIVE TABLE
An ideal arts and crafts activity for the whole family
Personalising Easter eggs develops children's creativity and allows all the family to spend time together. Rabbits, floral decorations that conjure up images of Spring, pastel colours... It's time to get out your pencils and paints and start some stunning craft projects.
It's also the perfect way to keep your children entertained before the long-awaited Easter chocolate egg hunt.
Looking for creative activities to do with your family?
Decorating, painting: discover all our fun and creative DIY ideas to do with your children.
Decorating, painting: discover all our fun and creative DIY ideas to do with your children.
The opportunity to create easy and original Easter decorations
Making decorative eggs out of modelling clay, creating paper bunnies for decoration, making an Easter wreath or garland to hang up: there is a wide variety of DIY craft projects you can do in the run-up to Easter.
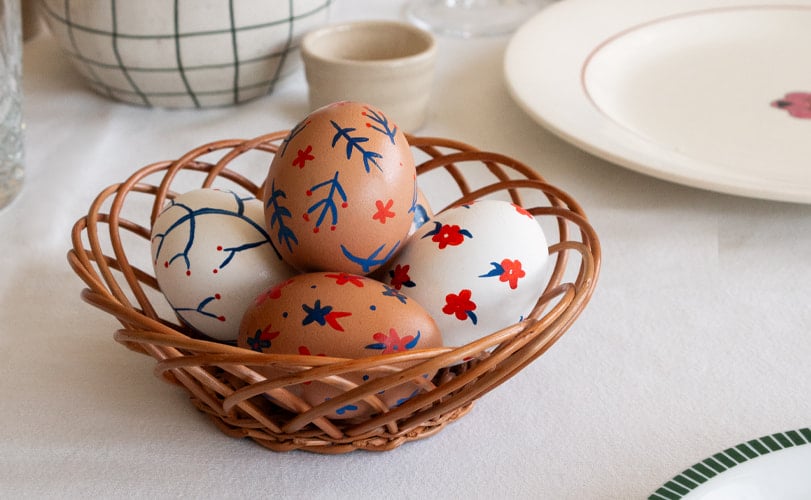
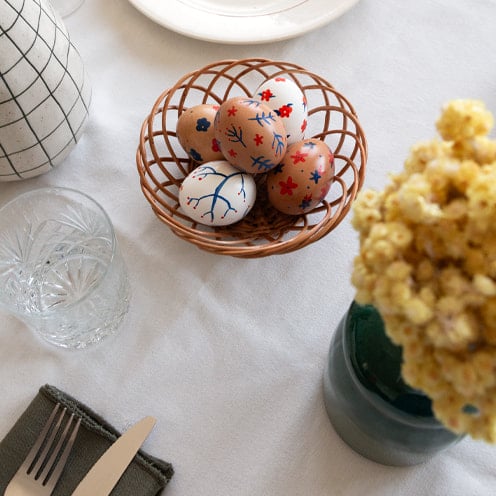
Easy to make with the family, colourful, personalised Easter eggs are the perfect addition to your table setting. Your decorative eggs will be the finishing touch that makes all the difference to your festive table. These original handcrafted eggs nestled in their basket are sure to impress your guests.
DECORATIVE EASTER EGG CRAFT ACTIVITY : WHAT SUPPLIES SHOULD YOU CHOOSE?
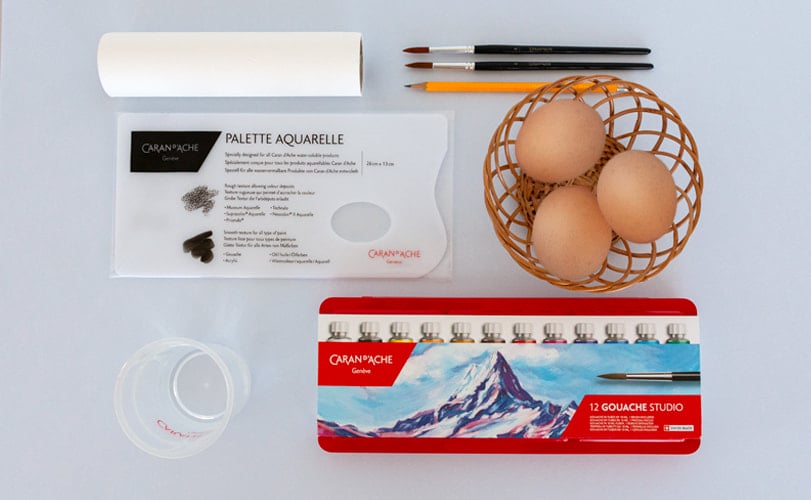
Opt for materials that are easy to handle and suitable for children. Here is what you will need to create your decorative Easter eggs:
• Hard-boiled eggs (cooked in advance).
• A graphite pencil with a strong HB lead.
• A box of 12 Gouache Studio paint tubes.
• Fine paintbrushes.
• A glass of water for cleaning your brushes.
• Paper towels.
• A palette for blending colours.
• A fixative spray (optional, used to protect finished creations).
DECORATING YOUR EASTER EGGS: FOLLOW OUR STEP-BY-STEP TUTORIAL
Step 1: prepare your eggs and equipment
First prepare your eggs by boiling them or buying them pre-boiled and ready to decorate.
If you intend to paint hard-boiled eggs, make sure you leave them to cool completely before starting to decorate them.
Get all your equipment together and prepare your table.
Step 2: choose patterns that inspire you
Before you start drawing and painting, take some time to think about the different designs you want to decorate your eggs with.
Flowers, leaves, natural landscapes, rabbits, chicks... Take inspiration from Spring and the spirit of Easter to choose your designs. You can also imagine abstract shapes (dots, lines, repeating geometric patterns).
If you're short on ideas, don't hesitate to look for inspiration on Pinterest.
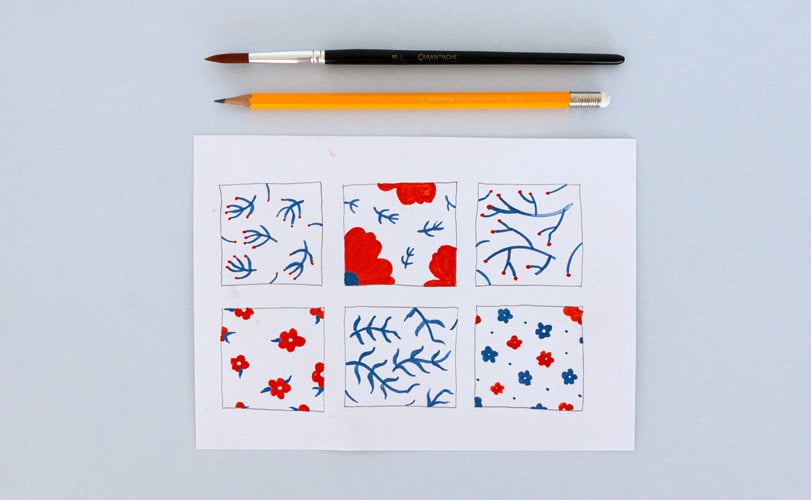
Step 3: draw the designs on a separate sheet of paper
Before drawing directly on the eggs, practise sketching on a sheet of paper. Draw your designs in pencil to test the shapes and proportions. This step is important to help children gain confidence before moving on to the painting part of the activity.
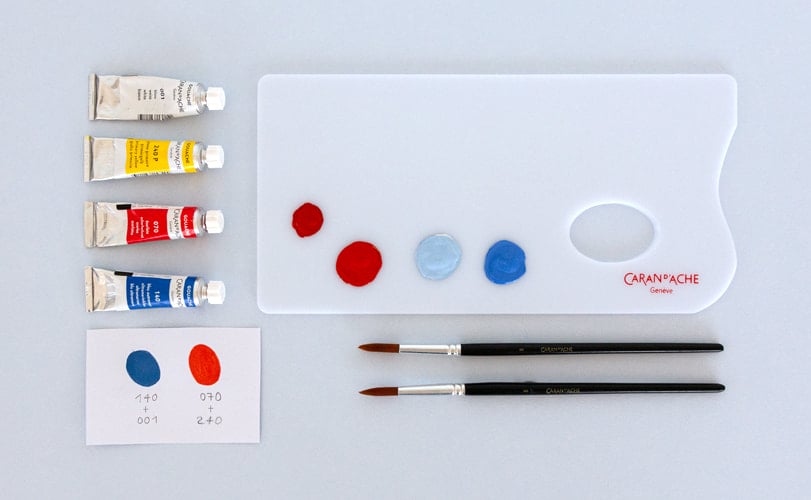
Step 4: create your own colour palette
Take your gouache paints and select the shades you want to use to decorate your eggs.
Use greens for leaves, light and luminous spring tones for flowers, deeper hues to create contrast: express your creativity and play with colour. Blend shades on your palette to achieve the desired colours.

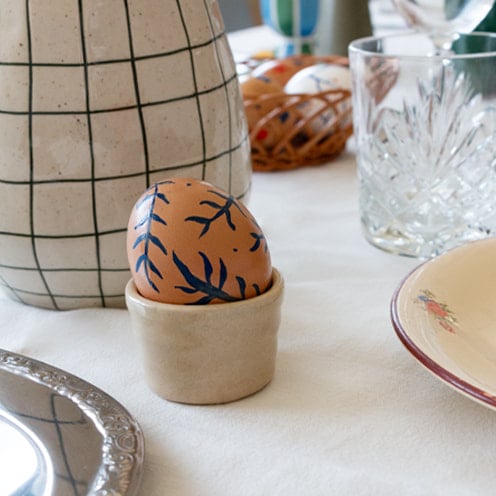
Step 5: paint your motifs onto the eggs
Once your designs and colour palette are defined, carefully reproduce your motifs on the curve of the egg:
• Use a fine brush to trace precise lines on the shell.
• Fill in your motifs with the selected shades, just as in your sketches.
• Repeat the process on the other eggs.
Are you and your kids new to painting?
Discover our techniques for painting with gouache.
Discover our techniques for painting with gouache.
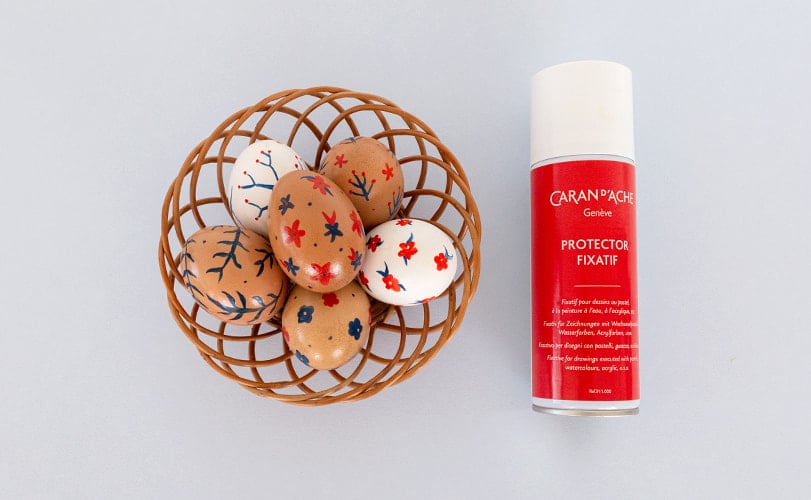
Step 6: apply a fixative for a shiny finish
Once completed, leave the eggs to dry completely.
If you want, you can apply a spray-on fixative to protect your work and give it a shiny appearance.
Once everything is dry, place your eggs in an attractive basket or on a tray to lend your Easter table a creative touch. It’s sure to impress your guests!
We’d be delighted to see the result of your creativity! Feel free to share them on the social networks using our hashtag #Carandache and mentioning @carandache.
🐇 Add an extra decorative flourish to your home with another DIY seasonal craft idea: create a hanging Easter wreath.
Free from 199$ purchase.
Possible return under 14 days.
Possible return under 14 days.


![]()
Create an account to benefit from all the exclusive advantages of our loyalty program.
Choose your online shop based on which country your order will be sent to
 Switzerland

Let’s stay in touch
Subscribe to our newsletter and benefit from a 10% discount on your next order.